
Hurricane-Proof Your Roof: 6 Lifesaving Upgrades (Before Storm Season Hits!)
Your roof is your home’s first defense against a hurricane’s fury. Standard roofs often fail catastrophically under extreme winds and torrential rain, leading to devastating structural damage, flooding, and even loss of life. Don’t wait for the storm warnings! Proactively fortifying your roof is a critical, lifesaving investment. Here are 6 essential upgrades to implement before storm season arrives.
1. Fortify Your Roof Deck: The Critical Foundation
- Why It’s Vital: The roof deck (sheathing) is the plywood or OSB layer nailed directly to your rafters/trusses. If it’s not securely attached, high winds can pry it loose, creating an opening for catastrophic failure.
- The Upgrade: Roof Deck Attachment Enhancement. This involves adding ring-shank nails or, far better, #8 or #10 corrosion-resistant screws to supplement existing fasteners. For maximum strength, consider adhesive applied between the sheathing and the trusses/rafters (creating a continuous bond).
2. Upgrade Roof-to-Wall Connections: Anchor Your Roof
- Why It’s Vital: This is arguably the most critical connection. Standard toenailing simply can’t withstand hurricane-force uplift. Failure here often leads to the entire roof structure being ripped off the walls.
- The Upgrade: Install Continuous Load Path Connectors. This means using engineered hurricane straps (ties) or clips (like H1, H2.5, or truss-specific connectors) made of galvanized steel. These connect the roof framing (rafters or trusses) directly to the top plate of the wall studs below. Ensure proper sizing and code-compliant installation with the correct nails/screws.
- Benefits: Creates an unbroken chain of strength from the roof down to the foundation, dramatically increasing resistance to the powerful upward suction forces generated by high winds.
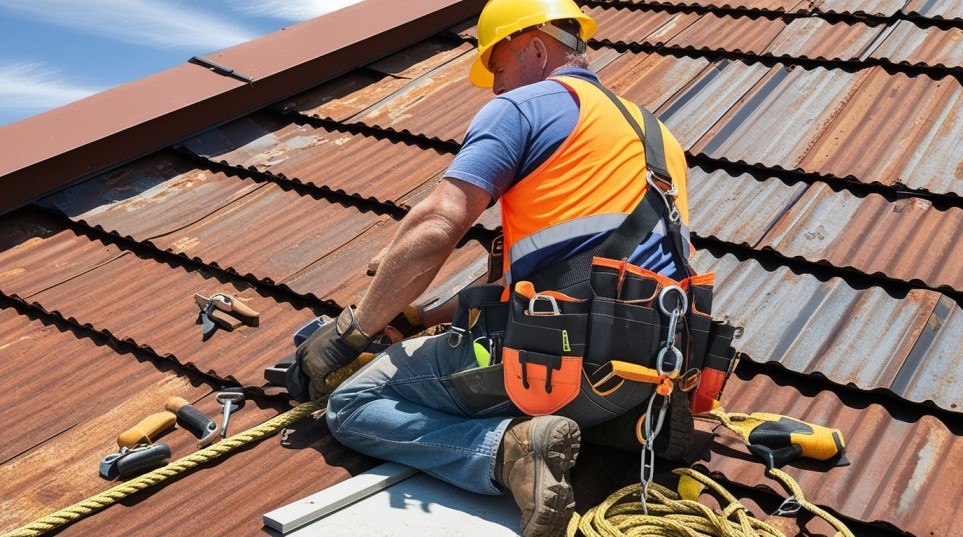
3. Secure Your Shingles/Tiles: Prevent Wind-Driven Rain Entry
- Why It’s Vital: High winds don’t just blow shingles off; they can lift edges, crack tiles, and create openings for torrential rain to pour underneath, causing massive water damage even if the shingle itself stays put.
- The Upgrade: Enhanced Fastening & Sealing.
- Asphalt Shingles: Use 6 nails per shingle (instead of 4) in the designated nailing zone. Apply sealant/adhesive strips along the leading edge of starter shingles and in valleys. Consider high-wind rated shingles (ASTM D3161 Class F or D7158 Class H) for replacement.
- Tile/Metal Roofs: Ensure all tiles are properly mechanically fastened (not just set in mortar). Inspect and replace damaged tiles. Secure metal panels with exposed fastener systems using screws with neoprene washers or consider standing seam metal roofing for superior wind resistance.
- Benefits: Minimizes shingle/tile lifting, reduces the chance of wind-driven rain infiltration, and helps keep the primary roof covering intact longer during the storm.
Repair vs. Replace: Making Smart Choices
When items break, deciding between repair and replacement depends on cost, age, and long-term value. If repairs exceed 50% of the item’s current value, it’s outdated, or frequently fails, replacement is often smarter. For minor issues or sentimental items, repair extends the lifespan sustainably. Weigh the trade-offs to save money and reduce waste!
4. Reinforce Roof Edges & Rakes: The High-Pressure Zones
- Why It’s Vital: Wind speeds accelerate dramatically at roof edges, eaves, and rakes (the sloped edges). These areas experience the highest uplift pressures and are most vulnerable to peeling.
- The Upgrade: Install Metal Drip Edge & Edge Ventilation Systems.
- Drip Edge: Use heavy-gauge, corrosion-resistant metal drip edge flashing along all eaves and rakes. Securely fasten it with nails/screws, ensuring it directs water away from the fascia and into the gutters.
- Reinforced Fascia & Soffits: Ensure fascia boards are securely nailed/screwed and consider adding hurricane clips specifically designed for fascia attachment. Use continuous soffit venting instead of individual vents that can be easily torn off. Brace Gable Ends if necessary.
- Benefits: Protects vulnerable edges from wind-driven rain intrusion, prevents fascia and soffit damage, and improves overall roof aerodynamics to reduce uplift.
5. Install a High-Performance Underlayment: The Secondary Water Barrier
- Why It’s Vital: If wind lifts shingles or tiles, or debris punctures the roof covering, your underlayment becomes the critical barrier preventing water from pouring into your attic and home.
- The Upgrade: Upgrade from Standard Felt. Use a synthetic underlayment (more durable, tear-resistant, and often slip-resistant) or, even better, an adhered membrane like “Ice & Water Shield” (peel-and-stick rubberized asphalt). Apply this upgraded underlayment as a secondary water barrier (SWB) in critical areas:
- The entire roof deck (ideal but costly)
- At least the first 6 feet from all edges (eaves, rakes, ridges)
- In all valleys
- Around all penetrations (chimneys, vents, skylights)
- Benefits: It provides a crucial, watertight backup layer if the outer roof covering is compromised, significantly reducing the risk of catastrophic interior water damage during the storm.
6. Fortify Roof Openings & Penetrations: Seal the Weak Points
- Why It’s Vital: Vents, pipes, chimneys, skylights, and even attic hatches are potential weak points where wind can catch an edge or water can find a path inside.
- The Upgrade: Enhanced Flashing & Bracing.
- Flashing: Ensure all penetrations have proper, code-compliant flashing installed. Upgrade to heavy-duty, corrosion-resistant metal flashing. Use high-quality sealants compatible with your roofing materials.
- Vents: Replace standard plastic or metal vents with wind-rated, reinforced attic vents designed to stay in place under high pressure. Consider hurricane-rated ridge vents.
- Skylights: Ensure they are impact-rated and properly flashed. Consider installing impact-resistant covers that can be deployed before a storm.
- Attic Hatches: Ensure they are securely latched and well-insulated. Consider adding positive locking mechanisms or bracing to prevent pressurization from blowing them open.
- Keywords: roof flashing, hurricane vents, skylight protection, chimney flashing, roof penetration sealing, wind-rated vents, attic access door bracing.
- Benefits: Prevents wind and water from exploiting vulnerable openings, maintaining the integrity of your roof envelope during extreme conditions.
Act NOW, Before the Storm!
Hurricane-proofing your roof isn’t a weekend DIY project for most homeowners. Consult with a licensed, experienced roofing contractor specializing in wind mitigation and hurricane retrofits. They can assess your specific roof’s vulnerabilities, recommend the most effective upgrades within your budget, and ensure installations meet strict local building codes and manufacturer specifications (crucial for warranties and insurance).
Investing in these upgrades is an investment in safety, property protection, and peace of mind. A fortified roof dramatically increases your home’s chances of weathering the storm, potentially saving you from catastrophic repair costs, displacement, and most importantly, protecting your family’s lives. Don’t gamble with the next hurricane season – make your roof hurricane-ready today!
Why Top Rated Roofing is Your Best Choice
Award-winning service: Voted “Best Roofing Company” for 3 years running.
15-Year Workmanship Warranty: Repairs you can trust.
Free Same-Day Inspections: Spot problems before they escalate.
Don’t Risk Your Family’s Safety!
Call Top Rated Roofing Now for a FREE Emergency Inspection: +44 7491 938445
Leave A Comment